Ditch the Deep Fry: Why Lighter Sweet & Sour Chicken Reigns Supreme
The tantalizing aroma of sweet and sour chicken often conjures images of bustling takeout kitchens and satisfying weeknight meals. It’s a classic for a reason: that irresistible balance of tangy, sweet, and savory, coating tender pieces of chicken. However, the beloved restaurant version often comes with a hidden cost – a heavy dose of deep-frying, excessive sugar, and sometimes, a laundry list of less-than-ideal ingredients. What if you could capture all that incredible flavor in a dish that’s genuinely healthier, easier to make, and ready in minutes?
Enter
lighter sweet and sour chicken – a culinary game-changer that promises all the deliciousness without the guilt. This isn't just a slight modification; it's a complete reimagining that prioritizes fresh ingredients, smart cooking techniques, and incredible taste. Forget the deep fryer; we're talking about succulent, seared chicken, vibrant vegetables, and a bright, tangy sauce that brings everything together in perfect harmony. Whether you're a seasoned home cook or just starting your culinary journey, this recipe offers a path to enjoying your favorite Chinese-inspired dish with a clear conscience, proving that healthy and delicious can indeed go hand-in-hand.
Unlocking the Flavor: Key Ingredients for Your Lighter Sweet & Sour Chicken
The secret to a truly outstanding
lighter sweet and sour chicken lies in both the quality of your ingredients and how you prepare them. Unlike its takeout counterpart, which often relies on heavy batters and sugary sauces, this homemade version celebrates freshness and balance.
First and foremost, the
chicken. We opt for boneless, skinless chicken breasts, cut into bite-sized pieces. Searing these rather than deep-frying them drastically reduces fat content while still achieving a delightful texture. A quick sprinkle of salt and pepper is all they need before hitting a hot skillet. This simple step locks in moisture and starts building a foundational layer of flavor.
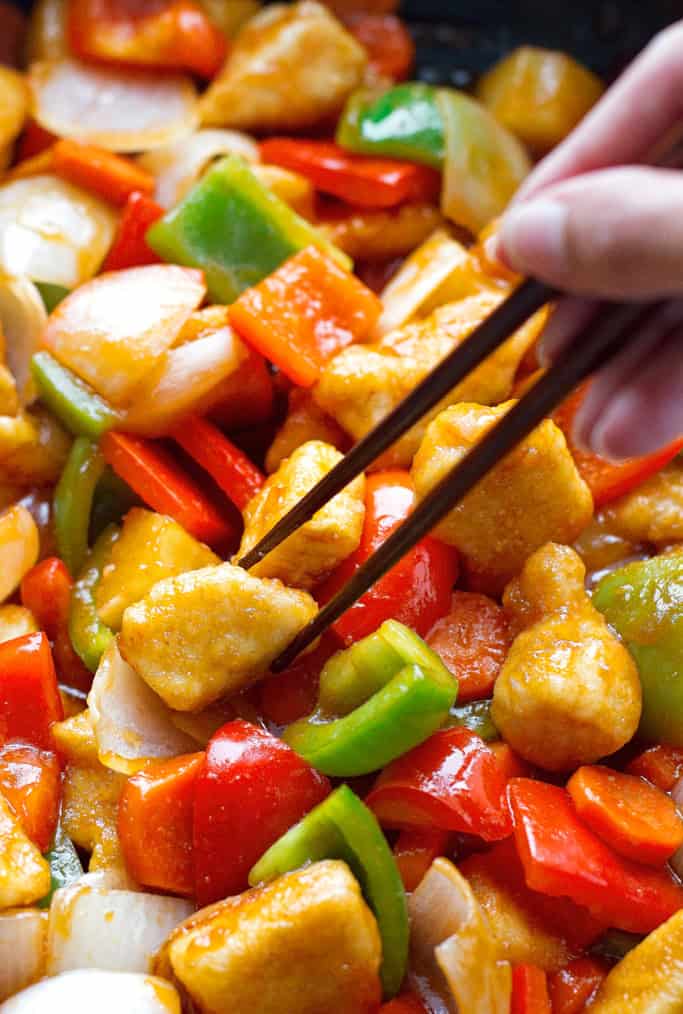
Next, the star of any healthy meal:
vegetables. This is where you can truly make the dish your own and load it up with nutrients and color. The reference context highlights bell peppers (for that beautiful color!), carrots, and onions, which are excellent choices. But don't stop there! Consider adding:
- Broccoli florets: Add a lovely crunch and a boost of Vitamin C.
- Mushrooms: Earthy umami flavor and a meaty texture.
- Snow peas: Crisp and refreshing, they cook quickly.
- Cauliflower florets: A heartier vegetable that absorbs flavor well.
- Water chestnuts or bamboo shoots: For an authentic crunch.
The goal is to sauté these until they are tender-crisp, maintaining their vibrant color and nutritional integrity. Garlic, a powerhouse of flavor and health benefits, is added towards the end of the vegetable sauté to ensure it doesn't burn but releases its aromatic best.
And let's not forget the delightful surprise that elevates this dish:
fresh pineapple. Far from just a garnish, pineapple brings a natural sweetness and acidity that brightens the entire dish, complementing the chicken and vegetables beautifully. Its enzymes also help tenderize the chicken slightly, and its juice forms the base of our incredible sauce. This isn't just about adding color; it's about layering flavors that make the "sweet and sour" truly sing.
Finally, the
sweet and sour sauce itself. This homemade version moves away from overly processed, high-fructose corn syrup-laden sauces. Instead, it typically features a blend of:
- Pineapple juice: For natural sweetness and a tangy base.
- Rice vinegar: Provides the essential "sour" kick.
- Soy sauce (low sodium): Adds umami and savory depth.
- Ketchup: Contributes a classic tomato tang and color.
- Brown sugar or honey: For a controlled, balanced sweetness.
- Cornstarch slurry: The magic ingredient that thickens the sauce to a perfect glaze.
By controlling these elements, you create a sauce that's bursting with authentic flavor but without the unnecessary additives and sugars found in many store-bought or restaurant versions. This careful selection and preparation of ingredients ensures that your
Homemade Lighter Sweet & Sour Chicken: Fresh, Tangy & Better is not just lighter, but also profoundly more delicious and satisfying.
Your Guide to Crafting Perfect Lighter Sweet & Sour Chicken at Home
Creating this delectable, healthier alternative to takeout is surprisingly straightforward, making it an ideal choice for busy weeknights. This one-skillet approach minimizes cleanup and maximizes flavor, proving that quick doesn't mean compromising on quality.
Step-by-Step Preparation: Efficiency is Key
The beauty of this recipe lies in its efficiency. Before you even turn on the stove, get everything prepped:
- Chicken Prep: Start with two boneless, skinless chicken breasts. Cut them into uniform, bite-sized pieces. Season generously with salt and pepper. Set aside.
- Vegetable & Pineapple Prep: Chop your chosen vegetables (bell peppers, carrots, onions, broccoli, etc.) into similar bite-sized pieces for even cooking. Dice fresh pineapple chunks. Having everything ready to go ensures a smooth cooking process.
- Sauce Prep: In a medium bowl, whisk together your sauce ingredients: pineapple juice, rice vinegar, low-sodium soy sauce, ketchup, and brown sugar (or honey). In a separate small bowl, dissolve cornstarch into a bit of pineapple juice or water to create a slurry – this is crucial for thickening.
This mise en place strategy is vital for quick stir-fry style dishes.
Cooking the Components: Building Layers of Flavor
With your ingredients prepped, the cooking itself is a swift dance in the skillet:
- Sear the Chicken: Heat 1 tablespoon of oil (like avocado or canola oil) in a large skillet or wok over medium-high heat. Add the seasoned chicken pieces and sear for about 5 minutes, turning once, until cooked through and lightly browned. Remove the chicken from the skillet and set it aside. This searing technique creates a flavorful crust without the need for deep-frying.
- Sauté the Vegetables: Add another tablespoon of oil to the same skillet. Add your harder vegetables first (carrots, onions, bell peppers) and sauté for about 5 minutes until they start to soften but are still crisp. Then, add the minced garlic and any quicker-cooking vegetables (like broccoli florets) and continue to cook for another 2-3 minutes, stirring occasionally, until aromatic and tender-crisp. Remove the vegetables and set them aside with the chicken.
- Simmer the Sauce: Pour your prepared sauce mixture into the skillet. Bring it to a gentle boil, stirring constantly. Once boiling, reduce the heat to medium-low and slowly whisk in the cornstarch slurry. Continue to stir as the sauce thickens into a glossy, beautiful glaze. This typically takes just a minute or two. The cornstarch is key to achieving that desirable takeout-style consistency without relying on unhealthy thickeners.
- Combine & Serve: Once the sauce has thickened, return the cooked chicken, sautéed vegetables, and fresh pineapple chunks to the skillet. Toss everything gently to coat evenly in the shimmering sweet and sour sauce.
Serve your
lighter sweet and sour chicken immediately over fluffy brown rice for added fiber, or traditional white rice. Garnish with a sprinkle of sesame seeds and perhaps some fresh chopped green onions for an extra pop of color and flavor. This
Minute One-Skillet Sweet & Sour Chicken: Quick & Flavorful meal is not just healthier and easier; it's a testament to how simple ingredients, thoughtfully prepared, can create truly extraordinary results.
Beyond the Recipe: Tips for Customizing Your Healthy Takeout Favorite
The beauty of cooking at home, especially with a dish as versatile as
lighter sweet and sour chicken, is the freedom to personalize it to your taste and dietary needs. Here are some tips to make this recipe truly your own:
Protein Alternatives
While chicken breast is a classic choice for its lean protein, don't hesitate to experiment:
- Shrimp: For a quicker-cooking option, add raw shrimp during the last few minutes of the sauce simmering.
- Tofu or Tempeh: For a vegetarian or vegan twist, press extra-firm tofu, cube it, and pan-fry until golden before adding to the sauce. Tempeh offers a nuttier flavor and firmer texture.
- Pork Tenderloin: Cut into cubes and sear just like the chicken for a slightly richer flavor.
Spice It Up or Tone It Down
If you enjoy a little heat, consider adding a pinch of red pepper flakes to the sauce, or a dash of sriracha when serving. For a milder flavor, ensure your sauce is well-balanced with a slightly higher proportion of pineapple juice or a touch more brown sugar if you find the vinegar too assertive. A squeeze of fresh lime juice at the end can also brighten the flavors even further.
Serving Suggestions Beyond Rice
While rice is a natural pairing, explore other bases to keep things interesting and boost nutrition:
- Quinoa: A protein-packed, gluten-free alternative.
- Cauliflower Rice: For a low-carb option that still soaks up all that delicious sauce.
- Noodles: Toss with whole wheat or rice noodles for a different texture.
- Lettuce Wraps: Serve the chicken mixture in crisp lettuce cups for a light, refreshing meal.
Tips for Perfect Texture and Flavor
- Don't Overcrowd the Pan: When searing chicken or sautéing vegetables, work in batches if necessary to avoid steaming instead of browning. This ensures a better texture and richer flavor.
- Taste and Adjust: Always taste your sauce before combining. Is it too sweet? Add more vinegar. Too sour? A pinch more sugar. Not salty enough? A tiny splash more soy sauce.
- Fresh Pineapple Makes a Difference: While canned pineapple chunks (drained) can work in a pinch, fresh pineapple offers superior flavor and texture that truly elevates this dish. It's worth the extra effort!
- Garnish for Impact: Don't underestimate the power of a simple garnish. Toasted sesame seeds, chopped green onions, or even a few cilantro leaves add visual appeal and an extra layer of flavor.
By embracing these customization options and tips, your homemade
lighter sweet and sour chicken will not only be healthier than takeout but also a truly unique culinary creation tailored perfectly to your preferences. It's a testament to how easy and rewarding it is to take control of your kitchen and create vibrant, flavorful meals from scratch.
Conclusion
Embracing the world of homemade Asian-inspired cuisine, especially dishes like
lighter sweet and sour chicken, is a revelation for anyone seeking delicious flavor without the unnecessary additions often found in takeout. We've seen how simple ingredient swaps – searing instead of deep-frying, focusing on fresh vegetables, and crafting a balanced sauce from scratch – can transform a traditionally heavy dish into a vibrant, nutrient-rich meal. Not only is this version healthier, offering a significant reduction in fat, sugar, and sodium, but it's also incredibly easy to prepare in a single skillet, making it ideal for even the busiest weeknights. With the ability to customize vegetables, proteins, and spice levels, you have complete control over creating a dish that perfectly suits your palate. So, next time that craving for sweet and sour chicken strikes, skip the restaurant menu and confidently grab your skillet. You’ll be rewarded with a meal that’s tangier, lighter, and undeniably better than anything you could order in. Dive in and savor the taste of healthy home cooking!